
Exchange 2016 POP Settings
Exchange 2016 POP Settings Guide: How to Configure Secure POP with TLS Encryption on Exchange 2016. Exchange 2019 settings are at the bottom of the document.
Requirements:
Hosted Exchange 2016 Mailbox with the POP function enabled inside of the panel.
You must have set your Domain Type to Authoritative. Any account configured in POP with an External Relay Domain Type will not be able to send out emails.
This same support document will also apply to users setting up FAX machines, scanners that send documents as email attachments.
For dedicated devices, we suggest you add a dedicated mailbox just for them.
Exchange 2016 POP Settings Setup:
Steps:
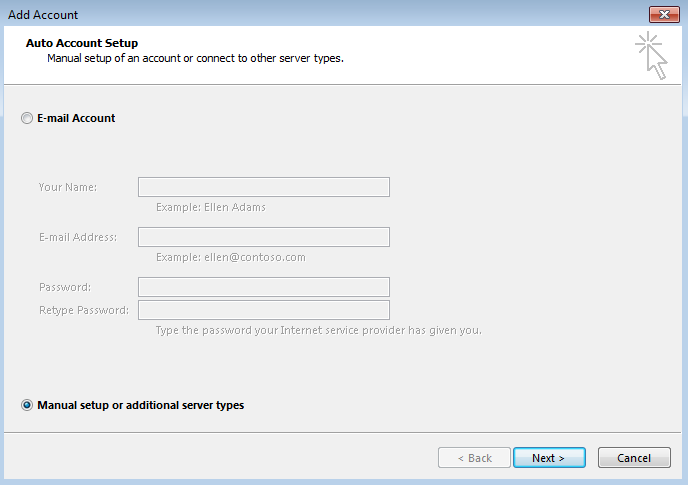
- From Outlook, add a new account, and select “manual setup”
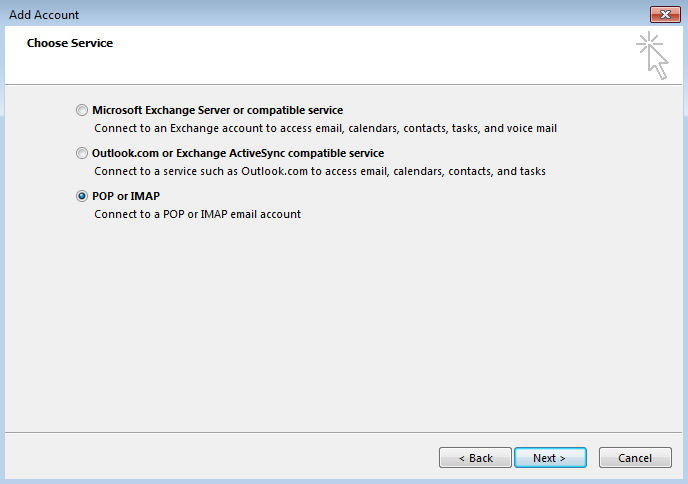
2. Select POP or IMAP
3. Enter in the mailbox details.
Your name: Your name
Email Address: Your full email address
Account Type: POP
Incoming Mail Server: mail.canadawidehostingservices.ca
Outgoing Mail Server (SMTP): mail.canadawidehostingservices.ca
User Name: Your full email address
Password: Your mailbox password
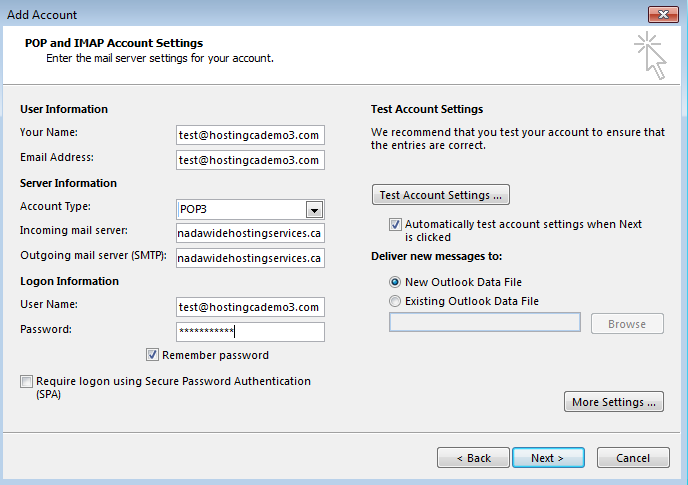
4. Select More Settings
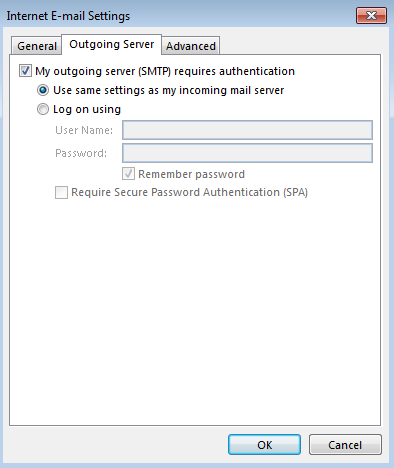
5. Go to the “Outgoing Server” tab and make sure “My outgoing server (SMTP) requires authentication is CHECKED. Make sure “Use same settings as my incoming mail server” is also selected.
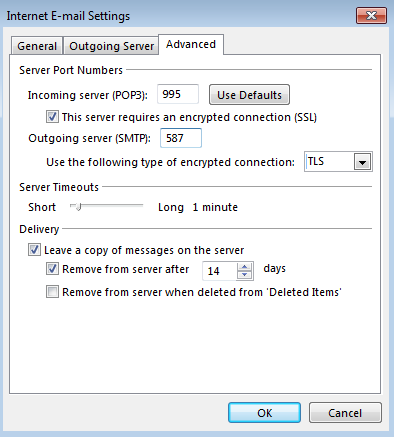
6. Choose the “Advanced” tab to enter in the secure IMAP ports.
Incoming server (IMAP) will stay on default 143. Make sure you select “TLS”
Outgoing server (SMTP) must be manually changed to 587 and the TLS dropdown box is on TLS. Press OK to save changes.
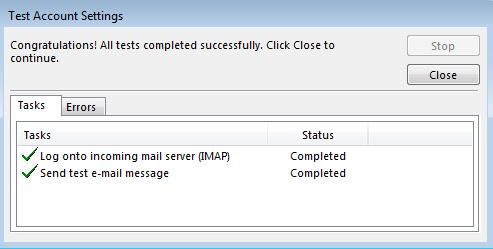
7. Test the connection settings by selecting next. You will see Outlook connect to the server with the settings you entered.
Exchange 2019 POP Settings
The same settings go for 2019. But the only difference is the server will be: exchange.hosting.ca
Incoming Mail Server: exchange.hosting.ca
Outgoing Mail Server (SMTP): exchange.hosting.ca