iOS IMAP Setup on Linux Hosting Controller
Easily add the IMAP mail account added into your iPhone or iOS device. Simply follow the screen shots. These instructions were made from an IOS 13.3.1 device. This config is applicable to the HC web and email plans.
Key Pieces of Information Required
- Email Address
- Email Password – best way is to check by logging into webmail.
- Server Name: mail8.hosting.ca
- For IMAP:
- IMAP Incoming Port: 143 TLS Encryption
- For POP:
- POP Incoming Port: 995 SSL Encryption
- SMTP Outgoing Port: 587 TLS Encryption
Setting up on an iOS Device
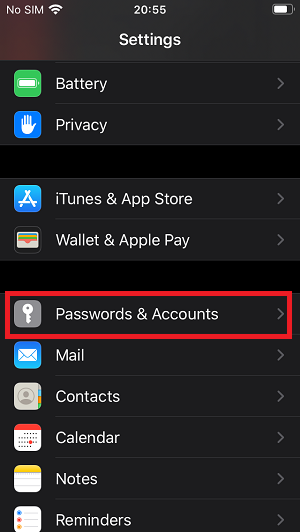
1. Click the Settings Icon
2. Select Passwords & Accounts
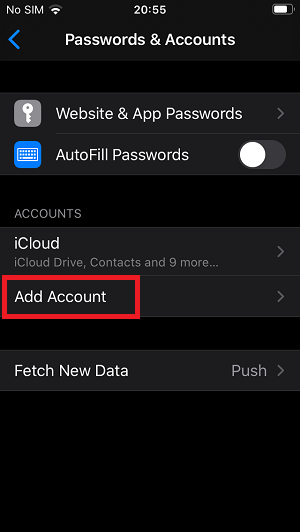
3. Select Add Account
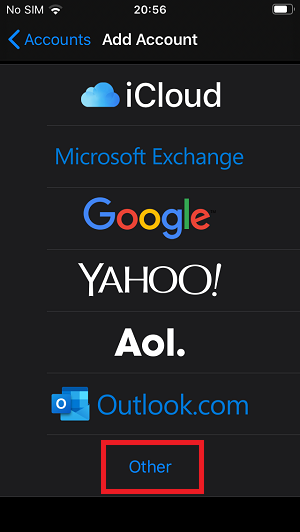
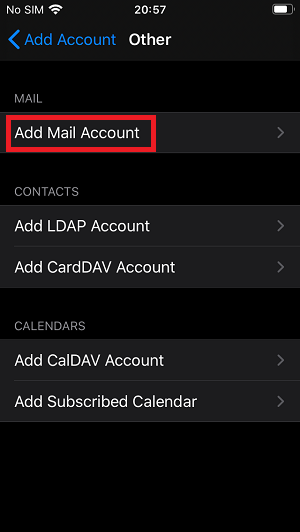
4. Select Other
5. Select “Add Mail Account”
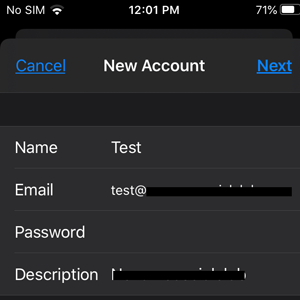
6. Enter in the details, and select NEXT when done
7. It will ask you to enter in the server settings. Selext Next when done.
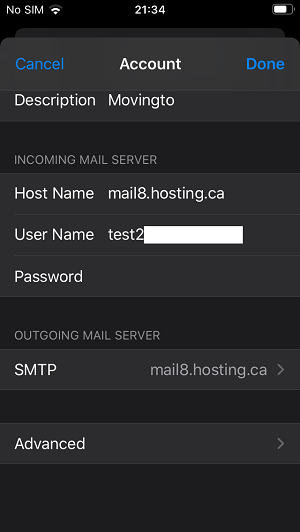
INCOMING MAIL SERVER:
HOST NAME: mail8.hosting.ca
USERNAME – email address
PASSWORD – email password
OUTGOING MAIL SERVER:
HOST NAME: mail8.hosting.ca
USERNAME: email address
PASSWORD: email password

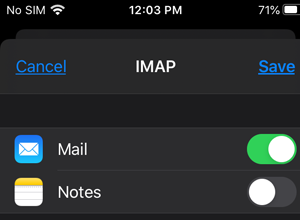
8. Once the details have verified, it will ask you to save the settings. Make sure the Mail icon toggle is GREEN and enabled. Select Save to save your new mailbox.
Now your account has been added.
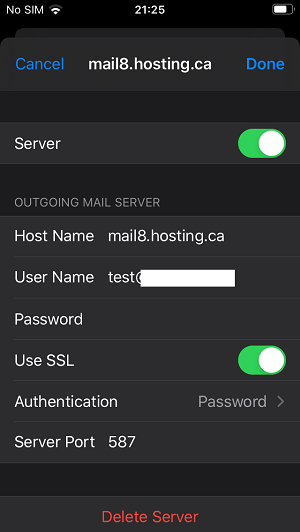
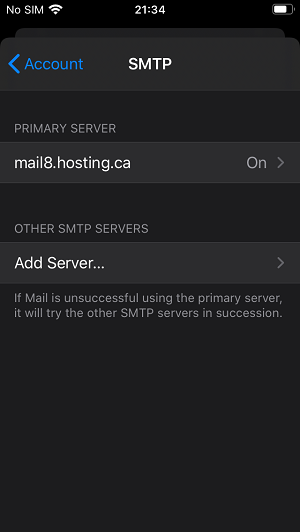
Seeing SMTP Settings
If you would like to see the SMTP settings, you can go to the new account you created. Go to the settings of the mailbox to check the SMTP server settings. Select the “mail8.hosting.ca” outgoing mail server.
Make sure the primary server mail8.hosting.ca is set to ON. Select it to see the details.
Next make sure the settings are all configured as below.